
 0
0



- Home
- Blog
- Equipment Knowledge
- How to Choose a Fabric Fusing Machine: A Practical Guide for Garment Manufacturers
How to Choose a Fabric Fusing Machine: A Practical Guide for Garment Manufacturers
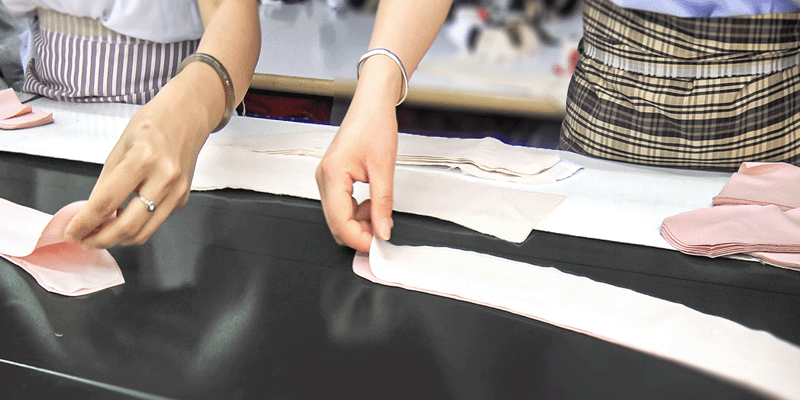
In garment manufacturing, the ability of a finished product to retain its shape, structure and appearance does not depend only on fabric choice and sewing quality. It is also influenced by how cut components are prepared before sewing.
A shirt collar needs suitable stiffness. A cuff should retain its structure. A jacket front may require stable support to maintain the intended silhouette. In many garments, these results are achieved by fusing interlining to selected fabric components before sewing.
When this process is poorly controlled, problems such as delamination, adhesive strike-through, bubbling or surface distortion may occur, affecting later sewing and finished-garment appearance.
A fabric fusing machine is designed to bond resin-coated fusible interlining to shell fabric or cut garment components under controlled temperature, pressure and processing time. For factories handling repeated component work, larger production volumes or quality requirements that demand stable bonding conditions, a fusing machine is an important piece of pre-sewing equipment.
This guide explains what fabric fusing is, how a fusing machine works, common fusing arrangements, quality defects and the points factories should confirm before selecting equipment.
What Is Fabric Fusing in Garment Manufacturing?
Fabric fusing is a process in which interlining coated with a thermoplastic adhesive resin is bonded to shell fabric or a cut garment component through heat and pressure.
The process usually takes place after cutting and before sewing. Once garment components have been cut, interlining is placed on the areas requiring support or shaping. The fusing machine applies controlled heat and pressure, allowing the adhesive layer to soften and bond with the fabric. After cooling, the bonded component becomes ready for sewing or subsequent processing. Garment areas commonly requiring fusible interlining include:
-
Shirt collars and collar stands.
-
Cuffs and front plackets.
-
Jacket, blazer or uniform fronts.
-
Pocket openings and reinforcement areas.
-
Waistbands and structured garment sections.
-
Selected appliqué, decorative or functional-material applications.
The purpose of fusing is not to replace all sewing operations. It is to provide selected garment areas with the required structure, handle, appearance and dimensional stability.
What Is the Difference Between Fusing, Seamless Bonding and Pressing?
Garment-processing equipment can have similar-sounding functions, but each process serves a different purpose. Factories should first determine the actual operation required.
| Equipment or Process | Main Purpose | Common Applications |
|---|---|---|
| Fabric Fusing Machine | Bonds fusible interlining to shell fabric or garment components | Collars, cuffs, plackets, jacket fronts and waistbands |
| Seamless Bonding Equipment | Joins fabric edges or garment structures using film, tape or ultrasonic processes | Activewear, underwear, functional garments and seam-sealing applications |
| Pressing and Shaping Equipment | Uses steam, heat and pressure to improve garment appearance and shape | Shirt pressing, trouser shaping and finished-garment presentation |
| Fabric Shrinking or Pre-Treatment Equipment | Manages fabric shrinkage and stability before production | Knits, shrink-sensitive materials and specified preparation processes |
Why Do Garment Factories Use Fusing Machines?
1. To Create Structure and Shape in Garment Components
Areas such as shirt collars, cuffs, jacket fronts and waistbands may not retain the intended structure using shell fabric alone. Fusible interlining adds support and helps these components maintain a more stable appearance during wear, handling and finishing.
2. To Establish More Consistent Processing Conditions
Manual heat application can vary according to operator experience, pressing duration and applied force. A fusing machine allows processing parameters to be set according to fabric and interlining conditions, supporting more consistent bonding within a production batch.
3. To Support Continuous Production
For factories processing large quantities of collars, plackets, cuffs, jacket components or uniform parts, continuous fusing equipment allows components to be fed through the bonding process in sequence, making the operation easier to organise within volume production.
4. To Reduce the Risk of Defects Caused by Unstable Processing
Bonding results depend on temperature, pressure, processing time and material compatibility. Equipment with stable control can help factories reduce defects caused by inconsistent parameters. However, actual fabric and interlining combinations should still be tested and confirmed before production.
How Does a Fusing Machine Work? Temperature, Pressure, Time and Cooling
Successful fusing depends mainly on four conditions:
| Key Condition | Function | Potential Problem If Incorrect |
|---|---|---|
| Temperature | Softens the adhesive layer on the interlining to form a bond | Insufficient heat may cause weak bonding; excessive heat may cause adhesive marks, colour changes or surface damage |
| Pressure | Brings the activated adhesive layer into appropriate contact with the shell fabric | Insufficient pressure may reduce bond strength; excessive pressure may push resin through the material or change the handle |
| Processing Time | Allows heat and pressure to act on the component for the required duration | Too little time may cause incomplete bonding; too much time may lead to strike-through or fabric damage |
| Cooling | Allows the adhesive layer to stabilise after processing | Inadequate cooling may affect bonding stability and handling after fusing |
How Do Operators Use a Fabric Fusing Machine?
Actual operating procedures vary according to equipment type and production requirements, but a general workflow can be organised as follows.
Step 1: Confirm the Shell Fabric and Interlining Combination
Before operation, staff should confirm:
-
The shell fabric and interlining are correctly matched.
-
The resin-coated side of the interlining faces the required fabric surface.
-
Components are flat and free from creases or foreign matter.
-
The material combination has been tested for fusing suitability.
-
Processing settings correspond to the relevant product batch.
Step 2: Preheat the Machine and Confirm Operating Conditions
Before formal production begins, the machine should reach the required temperature. Operators should verify temperature, pressure, conveyor speed or processing time before placing production components into the system.
Step 3: Position the Fabric and Interlining Correctly
The adhesive side of the interlining should be placed against the part of the shell fabric to be fused. Both materials should remain flat and correctly aligned. Incorrect positioning can leave sections unfused or affect later sewing and appearance.
Step 4: Feed the Components Through the Fusing Zone
A continuous fusing machine transfers components through heated and pressurised zones using a conveyor system. Operators should avoid overlapping, folding or misplacing components during feeding.
Step 5: Cool and Inspect the Fused Components
After fusing, components should be allowed to cool according to the workflow before inspection. Staff should check for:
-
Weak bonding or lifted edges.
-
Adhesive marks or strike-through.
-
Bubbling, wrinkling or uneven appearance.
-
Shrinkage, distortion or unusual handle.
Only acceptable components should proceed to sewing or later assembly.
What Common Fusing Arrangements Are Used?
Different fusing arrangements may be used according to component structure, garment area and production requirements.
Single Fusing
Single fusing is the basic arrangement in which one piece of fusible interlining is bonded to one shell-fabric component. It is commonly used for plackets, cuffs, collars, waistbands and local reinforcement areas.
Reverse Fusing
In reverse fusing, the interlining is generally positioned resin-side up, with the shell fabric placed over it for processing. This arrangement may be used for selected smaller components or positioning requirements, provided that fabric surface and processing conditions are suitable.
Sandwich Fusing
Sandwich fusing processes multiple layers within one operation to increase handling efficiency for certain applications. Since more layers are involved, temperature transfer, pressure and processing time require careful confirmation to avoid incomplete bonding or adhesive contamination between layers.
Double Fusing
Double fusing may be used where a garment component needs more defined structure, such as jacket fronts, shirt collars or collar stands. This arrangement may include different interlinings or local reinforcement materials and should be tested according to required appearance, stiffness and handle.
Common Fusing Defects: Delamination, Strike-Through and Bubbling
If fusing conditions are incorrect, or if shell fabric and interlining are not compatible, the quality of the fused component may be affected.
| Common Problem | Appearance or Effect | Possible Cause |
|---|---|---|
| Delamination | Shell fabric and interlining separate, lift at edges or lose bonding after handling | Insufficient temperature, pressure or time; unsuitable materials; inadequate cooling |
| Strike-Through or Adhesive Bleed | Resin passes through the fabric surface, leaving marks or stiff areas | Excessive temperature, pressure or processing time; lightweight or sensitive fabric |
| Bubbling | Raised, uneven or blistered appearance on the fused surface | Moisture, trapped air, uneven heating, insufficient bonding or later bonding failure |
| Fabric Distortion | Shrinkage, colour change, gloss change or unusual handle | Unsuitable processing conditions or inadequate heat resistance |
| Conveyor Belt Contamination | Adhesive attaches to the machine belt | Incorrect adhesive-side placement, resin bleed or unsuitable processing settings |
How to Choose Fabric Fusing Machines?
Factories have different production quantities, component sizes and line arrangements. Their equipment needs therefore differ.
| Equipment Direction | Suitable Situation | Evaluation Focus |
|---|---|---|
| Compact Fusing Machine | Limited space, smaller garment components or flexible processing requirements | Machine size, operating convenience and typical component dimensions |
| General Continuous Fusing Machine | Repeated processing of shirts, uniforms, jacket components and similar items | Conveyor width, heat and pressure control, feeding and collection workflow |
| Large Continuous Fusing Machine | Wider components, larger materials or high-volume production | Working width, continuous output, facility space and operator flow |
| Material-Specific Fusing Equipment | Stretch knits, reflective materials or other specialised applications | Material testing, surface result and processing parameters |
How Can OSHIMA Support Garment Fusing Applications?
Fusing garment components involves multiple conditions, including shell fabric, interlining, product area and production volume. One equipment setting may not suit every material, so factories need to evaluate configurations according to actual processing requirements. OSHIMA provides multiple fusing-equipment directions, including:
-
Compact open-side fusing machines for factories requiring flexible processing of smaller components or limited-space installation.
-
Continuous fusing machines for collars, cuffs, plackets, uniforms and other repeated component applications.
-
Large continuous fusing machines for wider cut pieces, larger materials or volume production.
-
Fusing equipment options for soft and elastic knitted materials.
-
Fusing equipment directions for reflective materials and specialised applications.
-
Feeding and collection arrangements to support continuous processing workflows.
Conclusion
A fabric fusing machine is important equipment for bonding interlining to garment components. Through controlled temperature, pressure, processing time and cooling, it helps collars, cuffs, plackets, jacket fronts and other structured areas achieve the required appearance and support.
However, quality results are not achieved simply by introducing equipment. If shell fabric and interlining are incompatible, or if temperature, pressure, processing time and cooling are not properly set, defects such as delamination, strike-through, bubbling or component distortion may still occur. Therefore, confirming principal products, fabrics, interlinings, component sizes and production quantities, followed by testing with actual materials to establish suitable processing conditions and machine configuration.
OSHIMA provides compact, continuous and large continuous fusing equipment solutions, supporting garment manufacturers in evaluating suitable bonding configurations according to product structure, material characteristics and production requirements.



Article Classification
Recent Articles
- The 30-90-180 Day Rule for Industrial Boiler Maintenance
- How Garment Machinery Supports Safety, Compliance and Environmental Management?
- How Factories Fix Fabric Shrinkage and Distortion Before Cutting?
- Industrial Iron & Vacuum Table Care: How to Extend Their Lifespan
- Cutting Floor ROI: How the M8s and TAC Save $100K Annually